AutoBrowser — Browsers and profiles
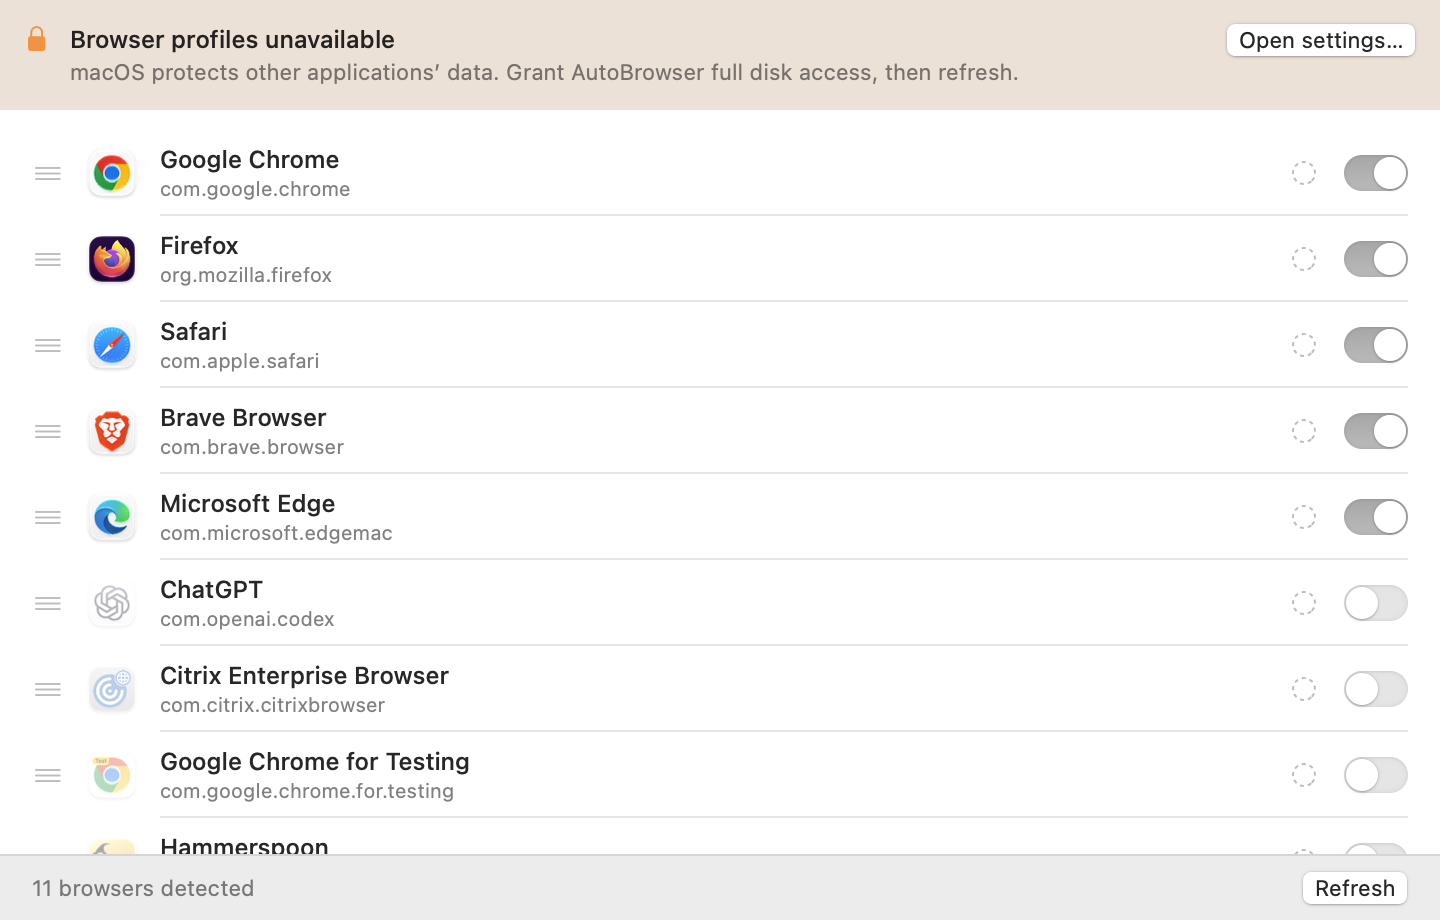
The Browsers tab of the settings lists the installed browsers and, under each one, its profiles.
Order
Drag a row by its handle (≡): the order of the list becomes the order of the picker and of the destination menus. A browser and its profiles move together.
Show or hide
- A browser’s switch removes it from the picker without uninstalling it.
- A profile’s switch removes only that profile. Hiding all the profiles of a browser removes it from the picker.
- Rules targeting a hidden browser or profile still apply.
Colors
The dot on each row opens a color menu (or None). The picker tile is tinted with that color, and a colored dot precedes the profile name. A profile without a color uses its browser’s.
Custom keys
In Custom shortcut mode (Appearance tab), a small field appears on each row: type a letter or a digit in it. Clear the field to remove the key.
Refresh
Refresh runs detection again — after installing a browser, creating a profile, or granting a permission.
Allow profile reading
To list profiles, AutoBrowser reads one file from each browser (Local State for Chrome, Brave, Edge…; profiles.ini for Firefox). macOS protects this data: without permission, the app works but shows no profiles, and a banner says so at the top of the tab.
- Click Open settings… in the banner. System Settings opens on Privacy & Security → Full Disk Access, and a Finder window shows AutoBrowser.
- Turn on AutoBrowser in the list. If it is not there, click + and choose
/Applications/AutoBrowser.app(or drag it from the Finder window). - If macOS offers it, accept Quit & Reopen; otherwise, click Refresh.
The permission applies to the app itself: a copy installed elsewhere must be allowed separately.
See also: Overview · Picker · Rules · Troubleshooting